
Every Day We Fight Aiming: Reticle Spread, Ballistics, and Weak Points
Every Day We Fight replaces dice-roll hit percentages with real-time manual aiming, requiring you to line up crosshairs in first person. Bullets land inside a visible reticle circle weighted toward the center, while enemies attempt to dodge under fire.
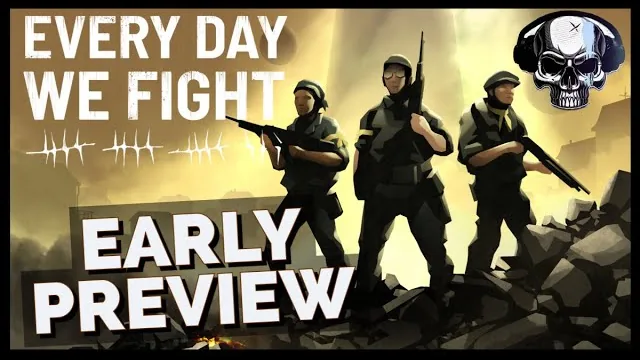
Every Day We Fight replaces dice-roll hit percentages with real-time manual aiming, requiring you to line up crosshairs in first person. Bullets land inside a visible reticle circle weighted toward the center, while enemies attempt to dodge under fire.
How the Manual Aiming System Operates
Combat actions transition the camera into a direct first-person perspective whenever a character fires. The game discards traditional dice rolls and percentage accuracy tables found in standard tactical games. Every projectile travels along a physical trajectory determined by your crosshairs, weapon recoil, and direct sight lines. If physical cover blocks the trajectory, the barrier absorbs the round. If an enemy limb or helmet extends beyond a barrier, a placed bullet inflicts damage.
Targeting precision depends on the circular reticle displayed around the crosshair. Rounds land anywhere within the outer boundary of this circle, with fifty percent of projectiles weighted toward the center dot. Weapons such as shotguns distribute pellets widely across the area, making them reliable at point-blank range but erratic at long distances. Rifles maintain tighter groupings, but rapid fire introduces recoil drift that shifts successive rounds off center.
Holding left shift engages breath control. This steadying mechanic zooms your perspective and reduces the diameter of the reticle circle for greater precision. Holding breath costs roughly three action points depending on the weapon and installed optics. Releasing breath control without firing refunds those spent action points back into your turn budget, allowing you to gauge shot alignment safely before committing.
Stance Choices and Targeting Methods
Choosing when to steady a shot or alter your firing angle alters shot accuracy and action point costs.
| Firing Stance | Recommended Situation | Trade-off |
|---|---|---|
| Standard Hipfire | Close encounters against large bodies | Full reticle circle spread increases miss chance |
| Breath Control Zoom (Left Shift) | Long-range firing at exposed heads | Costs roughly three action points from your budget |
| Cover Lean (W or Shoulder Swap) | Clearing corners, low barriers, and vehicles | Costs zero action points but exposes head and limbs |
Leaning past full cover or switching the weapon to the opposite shoulder requires no action point expenditure. Pressing forward near low cover raises your character to fire over the top of vehicles or sandbags. Positioning determines line of sight, and breaking sight lines behind physical structures prevents enemy projectile impacts.
Tracking Moving Targets and Evasion
Opponents do not remain frozen once gunfire begins. When you pull the trigger, time enters a slow-motion dilation state while the target actively scrambles toward safety. Automatic fire requires leading the target across the screen to ensure the full burst lands on flesh or armor rather than empty air.
Single-shot weapons expend an established cost per trigger pull, such as four action points. Fully automatic weapons expend a base cost of four action points plus two additional points for each subsequent round fired while holding down the trigger. Sustained automatic fire produces high damage output on stationary targets, but sweeping automatic bursts across moving targets risks wasting rounds along the perimeter of the reticle.
Enemies track sight lines through their own reactions. Red silhouettes in the tactical view display the last known location observed by your squad. Enemies frequently reposition away from that silhouette, meaning blind shots through broken walls or distant windows must account for updated movement rather than lingering holograms. Understanding real-time hit chance mechanics helps evaluate whether leading a moving target is worth your action point pool.
Modular Armor and Structural Weak Points
Armored Rifters carry distinct defensive plates across their bodies. Defense divides into individual segments: helmet, torso plating, left arm, right arm, left leg, and right leg. The damage preview bar flashes red on the specific layer currently targeted, revealing whether incoming rounds will hit ablative plating or direct health pools.
Targeting specific plates strips protection and leaves underlying anatomy vulnerable:
- Head: Stripping an alien helmet exposes the head, where follow-up rounds inflict increased damage multipliers.
- Limbs: Destroying arm and leg plating removes defense while preventing enemies from leaning out safely behind cover.
- Back and Core: Heavy units like Enforcers carry impenetrable frontal plating, but flanking reveals unarmored power cores and backpacks that collapse their health instantly.
- Hand-to-Hand Bypasses: Close-quarters melee punches from Dylan cost five action points and ignore enemy armor plates entirely.
Explosive weapons such as frag grenades strip multiple armor plates simultaneously across clustered foes. However, Rifters possessing an available reflex token will dive away from incoming grenades, requiring you to strip their dodge with light fire before launching explosives.
Environmental Targeting and Ambushes
Battlefields contain explosive props that expand tactical targeting options. Vehicles and standalone red fuel canisters feature their own damage bars. Placing a single shot into a exposed gas tank creates an instant explosion, destroying adjacent enemy squads, collapsing cracked masonry walls, and clearing path obstructions.
Combat encounters initiated outside detection zones allow an opening shot that consumes zero action points. Sneaking past enemy detection radii with crouched movement enables you to position squad members on elevated balconies or behind flanking corners. Choosing the right weapons before opening fire ensures high initial burst damage, and coordinating team reflex actions prepares your squad to counter enemy retaliations.
Weapon scopes, customized barrels, and precision stocks unlocked through scrap crafting modify base reticle diameter, recoil recovery, and zoom magnification. Consulting a weapon attachments guide provides detailed part breakdowns to optimize every long-distance rifle or close-range shotgun in your stash.